I know there are lot many blogs around this topic but this one captures the steps with screenshots & proven by following the below steps for setting up SharePoint 2013 server for provider hosted application app model configuration with high trust s2s.
It has been configured on over 50 SharePoint development servers.
The below steps have been documented in here SharePoint App Model Steps
SP 2013 Server App Model Configuration – ONE TIME
Create an isolated app domain on your development computer
Ensure that the spadmin and sptimer services are running by opening a command prompt and typing the following commands.
net start spadminv4
net start sptimerv4
Create your isolated app domain by running the SharePoint Management Shell as an administrator and typing the following command.
Set-SPAppDomain "wbmsspdev19"
Ensure that the SPSubscriptionSettingsService and AppManagementServiceInstance services are running by typing the following command in the SharePoint Management Shell.
Get-SPServiceInstance | where{$_.GetType().Name -eq "AppManagementServiceInstance" -or $_.GetType().Name -eq "SPSubscriptionSettingsServiceInstance"} | Start-SPServiceInstance
Verify that the SPSubscriptionSettingsService and AppManagementServiceInstance services are running by typing the following command in the SharePoint Management Shell. The output will indicate whether each service is online.
Get-SPServiceInstance | where{$_.GetType().Name -eq "AppManagementServiceInstance" -or $_.GetType().Name -eq "SPSubscriptionSettingsServiceInstance"}
Specify an account, application pool, and database settings for the SPSubscriptionService and AppManagementServiceInstance services by typing the following code in the SharePoint Management Shell. If you created a SPManagedAccount in the preceding step, use that account name here.
$account = Get-SPManagedAccount "wb\spm13dev"  (spm13dev is a service account)
$appPoolSubSvc = New-SPServiceApplicationPool -Name SettingsServiceAppPool -Account $account
$appPoolAppSvc = New-SPServiceApplicationPool -Name AppServiceAppPool -Account $account
$appSubSvc = New-SPSubscriptionSettingsServiceApplication –ApplicationPool $appPoolSubSvc –Name SettingsServiceApp –DatabaseName SettingsServiceDB
$proxySubSvc = New-SPSubscriptionSettingsServiceApplicationProxy –ServiceApplication $appSubSvc
$appAppSvc = New-SPAppManagementServiceApplication -ApplicationPool $appPoolAppSvc -Name AppServiceApp -DatabaseName AppServiceDB
$proxyAppSvc = New-SPAppManagementServiceApplicationProxy -ServiceApplication $appAppSvc
Specify your tenant name by typing the following code in the SharePoint Management Shell.
Set-SPAppSiteSubscriptionName -Name "app" -Confirm:$false
Create a web application & site collection with Developer site template.
To create a self-signed test .pfx certificate file
- When you are debugging a high-trust app for SharePoint in Visual Studio, the remote web application is hosted in IIS Express on the machine where Visual Studio is installed. So the remote web application computer doesn’t have an IIS Manager where you can create the certificate. For this reason, you use the IIS on the SharePoint test server to create the certificate. In IIS manager, select the ServerName node in the tree view on the left.
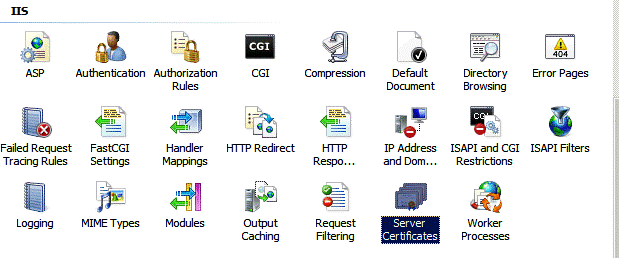
- Select the Server Certificates icon, as shown in Figure 1.
Figure 1. Server Certificates option in IIS

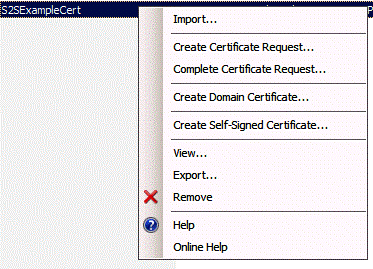
- Select the Create Self-Signed Certificate link from the set of links on the right side, as shown in Figure 2.
Figure 2. Create Self-Signed Certificate link

- Name the certificate WBMSSPDEV19HighTrustCert, select Web Hosting and then choose OK.
- Right-click the certificate, and then select Export, as shown in Figure 3.
Figure 3. Exporting a test certificate

- In Windows, or at a command line, create a folder called C:\Certs.
- Back in IIS Manager, export the file to C:\Certs and give it a password. In this example, the password is password.

To create a corresponding .cer file
- In IIS manager, select the ServerName node in the tree view on the left.
- Double-click Server Certificates.
- In Server Certificates view, double-click WBMSSPDEV19HighTrustCert to display the certificate details.
- On the Details tab, choose Copy to File to launch the Certificate Export Wizard, and then choose Next.
- Use the default value No, do not export the private key, and then choose Next.
- Use the default values. Choose Next.
- Choose Browse, browse to C:\Certs, name the certificate WBMSSPDEV19HighTrustCert, and then choose Save. The certificate is saved as a .cer file.
- Choose Next.
- Choose Finish.
Configure SharePoint 2013 to use certificates and configure trust for your app
$publicCertPath = "C:\Certs\WBMSSPDEV19HighTrustCert.cer"
$certificate = New-Object System.Security.Cryptography.X509Certificates.X509Certificate2($publicCertPath)
New-SPTrustedRootAuthority -Name "WBMSSPDEV19HighTrustCert" -Certificate $certificate
$realm = Get-SPAuthenticationRealm
$specificIssuerId = "11111111-1111-1111-1111-111111111119"
$fullIssuerIdentifier = $specificIssuerId + '@' + $realm
New-SPTrustedSecurityTokenIssuer -Name "WBMSSPDEV19 High Trust Cert" -Certificate $certificate -RegisteredIssuerName $fullIssuerIdentifier –IsTrustBroker
iisreset
$serviceConfig = Get-SPSecurityTokenServiceConfig
$serviceConfig.AllowOAuthOverHttp = $true
$serviceConfig.Update()
New Provider app creation – (Follow steps for every new provider app)
- Open visual studio & create provider-hosted app

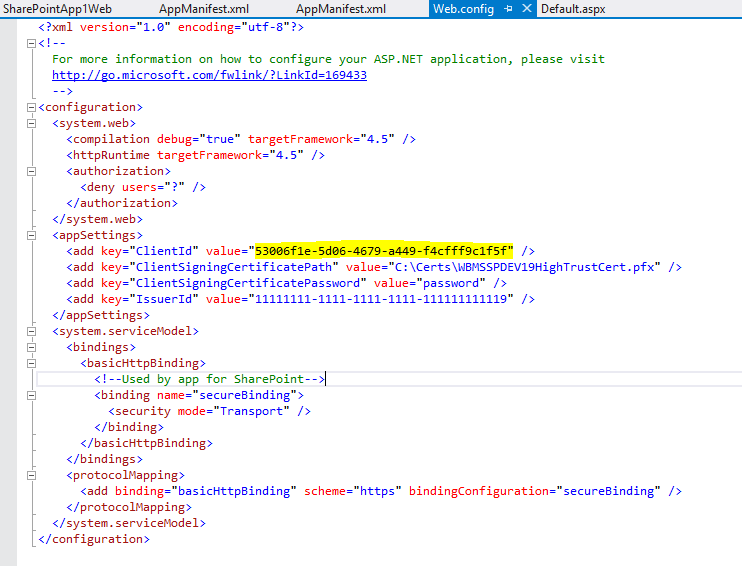
- On the certificate screen, select the certificate from C:\Cerfts folder & mention the issuer id 11111111-1111-1111-1111-111111111119

- Generate app id by the below URL appregnew.aspxEx- http://wbmsspdev19:1001/_layouts/15/Appregnew.aspx
- Paste the app id as client id on both the app & web projects.
AppManifest.xml & web.config file.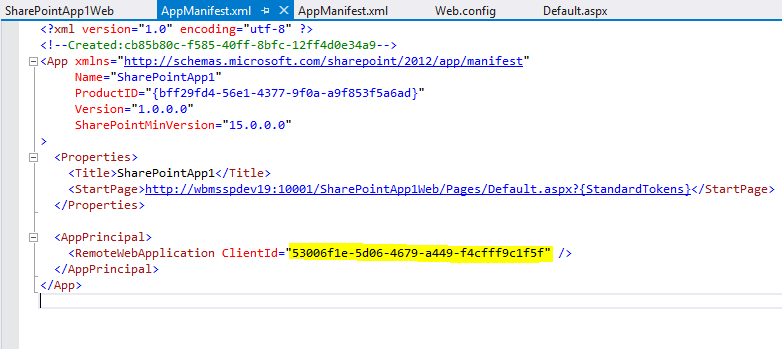


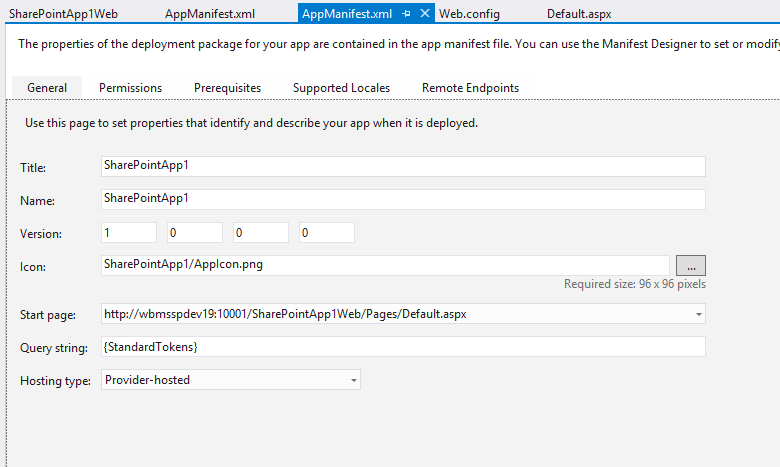
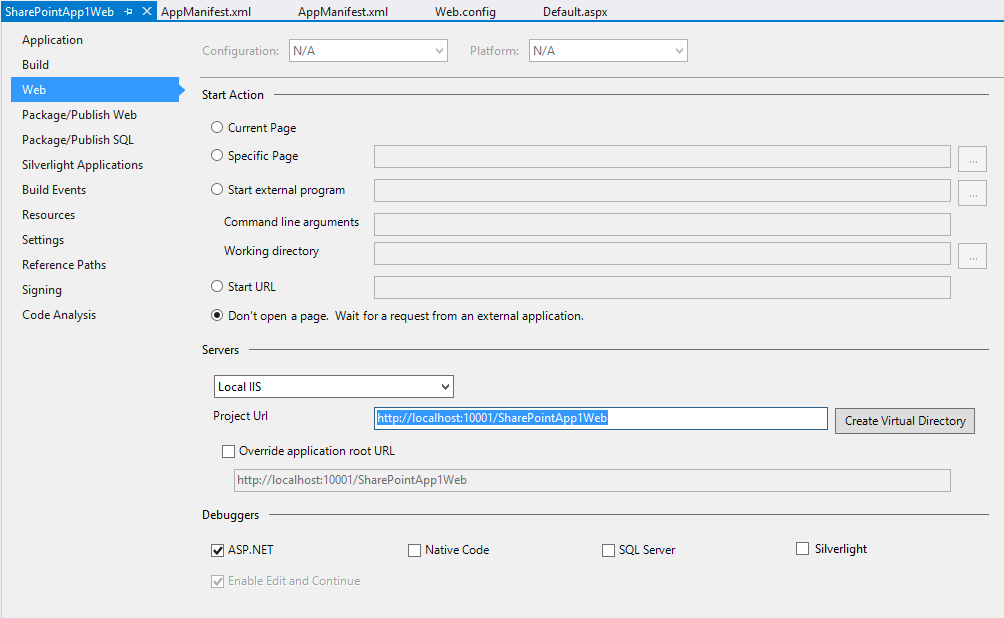
- Create a web site on IIS & update this website info on appmanifest.xml & project url under web properties.
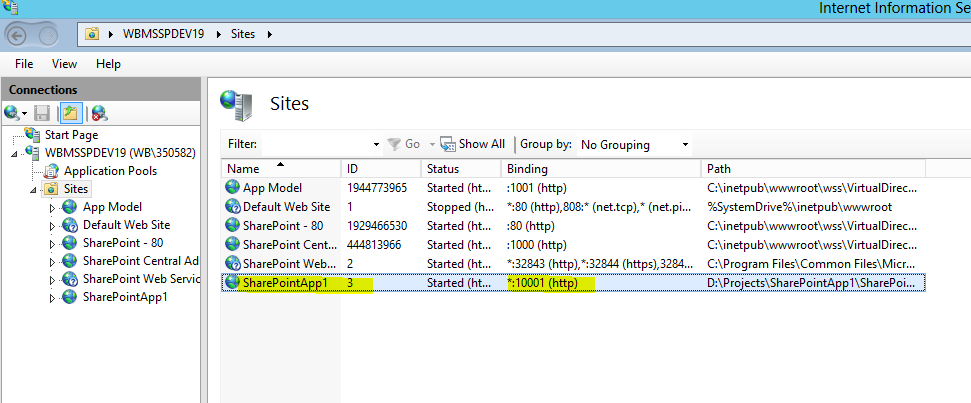
Ex: <StartPage>http://wbmsspdev19:10001/SharePointApp1Web/Pages/Default.aspx?{StandardTokens}</StartPage>


- Register every new provider app model app with the below script.
- clientID – generated in step 3 above
- targetSiteUrl – Provider app site url
$appDisplayName = "SharePointApp1"
$clientID = "53006f1e-5d06-4679-a449-f4cfff9c1f5f"
$targetSiteUrl = "http://wbmsspdev19:1001/"
$targetSite = Get-SPSite $targetSiteUrl
$realm = Get-SPAuthenticationRealm -ServiceContext $targetSite
$fullAppPrincipalIdentifier = $clientID + '@' + $realm
$registeredAppPrincipal = Register-SPAppPrincipal -NameIdentifier $fullAppPrincipalIdentifier -Site $targetSite.RootWeb -DisplayName $AppDisplayName
$registeredAppPrincipal | select * | Format-List
$registeredAppPrincipal | select * | Format-List | Out-File -FilePath "Output.txt"
References
App domain & Dev setup
http://msdn.microsoft.com/en-us/library/fp179923(v=office.15).aspx
High trust app creation S2S
http://msdn.microsoft.com/en-us/library/fp179901(v=office.15).aspx
